Lighting for bird photography
Unlike studio or still-life photography, when photographing birds you have to work with the light available to you and your subject. The quality and direction of light falling on a bird will have a dramatic impact on the mood created in the image, so you really do have to learn how best to use and manipulate the light that you have. And there are a number of methods that you can implement to give you a degree of control over your lighting, too.

Don’t be afraid to use your camera, whatever the time of day
The best light of the day generally occurs in the couple of hours after the sun rises or before the sun sets, as the golden glow of the sun low in the sky helps to enrich colors. However, don’t be deterred from using your camera on bright, overcast, or cloudy days. Even on bright, sunny days, if a good opportunity for an image arises, you should take it.

Although midday light can be harsh a fill-in flash can do wonders to help soften harsh shadows, and Photoshop can be used to easily create catchlights in eyes when post-processing. All the same, you might want to be wary of taking photos when your shadow is shorter than you and perhaps ease off until the light improves later in the day.
Front-lit photos
There is always a temptation to shoot nicely front-lit bird images: colors are always rendered well, there are few shadows created, and many pleasing images are created in this way. For shots like this, you need to ensure the sun is shining from over your shoulder. However, do experiment with the direction of light, since more eye-catching images can be made by bucking the trend. While front-lit images are two-dimensional in appearance, you can create more perceived depth in an image when there is a three- dimensional look. To achieve this, you have to use the direction of the light to create contrast with shadow.
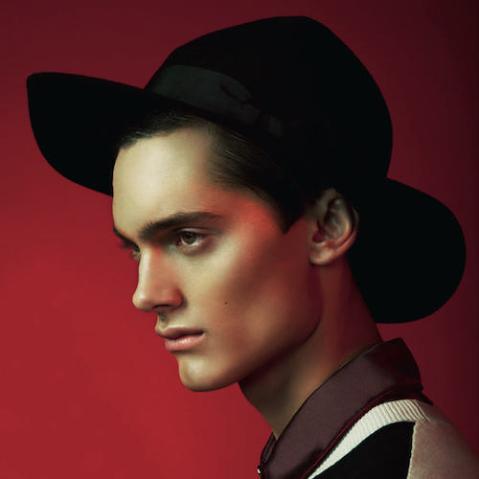
Side-lit shots
Sidelit images can look dramatic, elevating a pleasing portrait to something more striking. Sidelighting works best when the sun is low—this kind of shot is not so effective in the middle of the day—and you might find that shooting low helps. You should ensure that the lit side of the bird is correctly exposed, because if any areas are burned out the effect is lost; by exposing for the lit side, the shadows will take care of themselves. Sidelighting can give a three-dimensional look to an image that is particularly effective with large birds.

Back-lit images
Backlighting can be dramatic, too; the mood of a picture shot from the front can be completely altered by shooting in the opposite direction, but watch out for lens flare caused by internal reflections from lens elements. Chipped or scratched glass or dirt on the lens can also cause problems; to avoid this use a deep lens hood, or try shading the top of the lens with your hand. When using backlight you can achieve a wonderful rim-lighting effect if your subject is against a dark background; the outline of the bird becomes lit up, as if wearing a halo.

Silhouettes
Silhouettes can be produced through strong backlighting, aligning your bird in line with the setting or rising sun, or at least against a bright, colorful sky. Bird silhouettes work best when the outline is easily recognizable. Examples might be a cormorant drying its wings, a crane silhouetted in flight, or perhaps an eagle.
Good silhouette shots are rarely unexpected; they take a bit of planning and knowledge of favored perches or flight opportunities. It is then a matter of waiting for the right conditions and hoping the bird cooperates by using the chosen perch.
To what degree you silhouette your subject is personal choice, often any exposure to within two or three stops will work, the variance being the intensity of the colors in the sky. You can experiment to find the best exposure, perhaps starting by exposing for an area of the sky close to the sun, but not where it is brightest. Remember that when your histogram has the silhouetted bird in the frame, it will show tall spikes on the left-hand end, indicating clogged or almost clogged blacks. Don’t worry about this; the aim is to achieve the shape of the bird rather than showing any plumage detail.
To achieve effective silhouettes, you ideally need to be in fairly open habitats—the flatter the better,—as the best results will be shot close to sunrise or sunset. Stretches of water, deserts, estuaries, and marshes all make great locations, and waterbirds are a favorite subject for these type of images. Flocks of birds can be effective: there are really plenty of options.
The Bird Photography Field Guide is David Tipling’s expert reference to teach you everything you need to know about capturing birds in all their beauty. With useful advice on the essential equipment and photographic techniques, as well tips on composition to get you thinking more creatively, you’ll be taking superb photos that show off your subject in the best possible way.
[one_whole boxed=”true”]
 The Bird Photography Field Guide, by David Tipling
£4.99 Download the PDF now!
This PDF version retains the styling of the original print book.
RRP for print edition: £8.99
[button color=”Accent-Color” size=”small” url=”https://www.ilexinstant.com/product/the-bird-photography-field-guide/” text=”Digital Edition”] [button color=”Accent-Color” size=”small” url=”http://www.amazon.co.uk/dp/1907579249/ref=as_sl_pc_tf_lc?tag=ilexpresscom-21&camp=1406&creative=6394&linkCode=as1&creativeASIN=1907579249&adid=12S8VWZPGS1HB492VZE9&&ref-refURL=http%3A%2F%2Fwww.ilexinstant.com%2Fproduct%2Fthe-bird-photography-field-guide%2F” text=”Amazon UK (Print)”]
[button color=”Accent-Color” size=”small” url=”http://www.amazon.com/The-Bird-Photography-Field-Guide/dp/0240817761/ref=as_sl_pc_qf_sp_asin_til?tag=ilexinst-20&linkCode=w00&linkId=&creativeASIN=0240817761″ text=”Amazon USA (Print)”]
[/one_whole]