The hows and whys of dodging and burning
Dodging and burning is a well established photo-editing technique that dates back to conventional darkroom processing. The technique involves making local exposure adjustments to specific parts of an image to make that particular area brighter (dodging) or darker (burning).
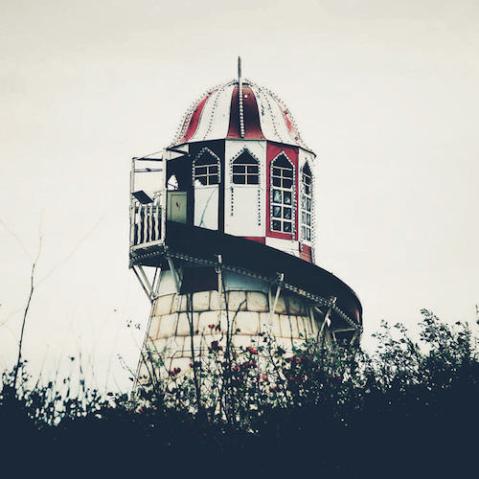
 Without the use of a neutral density filter, this photo doesn’t do justice to the intensity of the scene. But dodging and burning can help.
When dodging in the darkroom, a piece of card is used to mask a specific area from the light of the film enlarger. The less light that strikes the photographic paper, the lighter the results. Burning involves making a standard exposure, and then further exposing those areas that are required to be darker, while masking the rest of the image.
Dodging and burning tools exist in Raw processors in the form of the adjustment brush, which can be used to selectively lighten or darken specific areas of the image.

Select the skies by choosing the adjustment brush and either select the Burn option or reduce the exposure setting of the brush. Zoom into the sky region and start painting over the clouds. You’ll notice the clouds become darker as you paint over them.

All Raw processors, when using a selection tool, will allow you to view the selection as a colour overlay. This is helpful, as it shows you exactly the areas that have been selected. Notice how the darker cliffs have been carefully avoided.

With the sky region selected, you can fine tune the exposure to whatever you want using the adjustment sliders. Here, we’ve reduced the exposure of the sky so that the clouds more closely resemble how they were. Once the proper exposure setting is found, press enter to clear the mask and make the adjustment.

Next, repeat the process on the underexposed rocks. The Dodge brush was selected for this, but you can alternately increase the exposure setting of the adjustment brush—the effect is the same.

With the sky darkened and the foreground rocks brightened so that they draw in the viewer’s eye, the final stage was to convert the image to black and white and sharpen it to ensure the textures stand out in stark relief.
Unlock the full potential of each and every image with reliable post-production techniques that will become a fundamental part of your photography. Using easily followed, step-by-step instructions, Michael Freeman demystifies the complexities of today’s high-powered editing programs to provide you with effective digital workflows tailored to your particular photographic style, and using whichever editing programs you are most comfortable with.
 Photo School: Digital Editing
Michael Freeman and Steve Luck
Buy it now!